

How To Make A Graphic Tee
Do you want to know how to create graphic t-shirts at home using iron-on transfer paper? Well, keep on reading!

So, a couple of months ago I purchased a set of iron-on transfer paper but completely ignored it until recently after I decided I want to create my own Halloween graphic t-shirts.
Here's a tutorial of my DIY project you can use as a guide to create your own custom print t-shirt at home.
Graphic T-Shirts At Home Using Iron-On Transfer Paper: Supply List
- Graphic design solution
- T-shirt
- Iron-on transfer paper
- Printer
- Pencil
- Scissors
- Pillowcase
- Iron
Graphic design solution:
Firstly, you need to create a design for your t-shirt. You can use a graphic design solution like Adobe Illustrator to design your t-shirt.
However, Adobe Illustrator isn't free. Therefore if you want to create your design without incurring costs you may consider using Microsoft Word for simpler custom t-shirt designs.
To create my custom t-shirt Halloween design I used Canva and the results were amazing. Graphic design solutions like Canva and PicMonkey make creating designs a breeze compared to other fancier complex programs like Adobe Illustrator. I used both programs and I can't recommend them enough.
T-shirt:
For this custom print t-shirt DIY, any plain t-shirt will do, so grab your favorite plain t-shirt and add it to your supply pile.
Iron-on Transfer Paper:
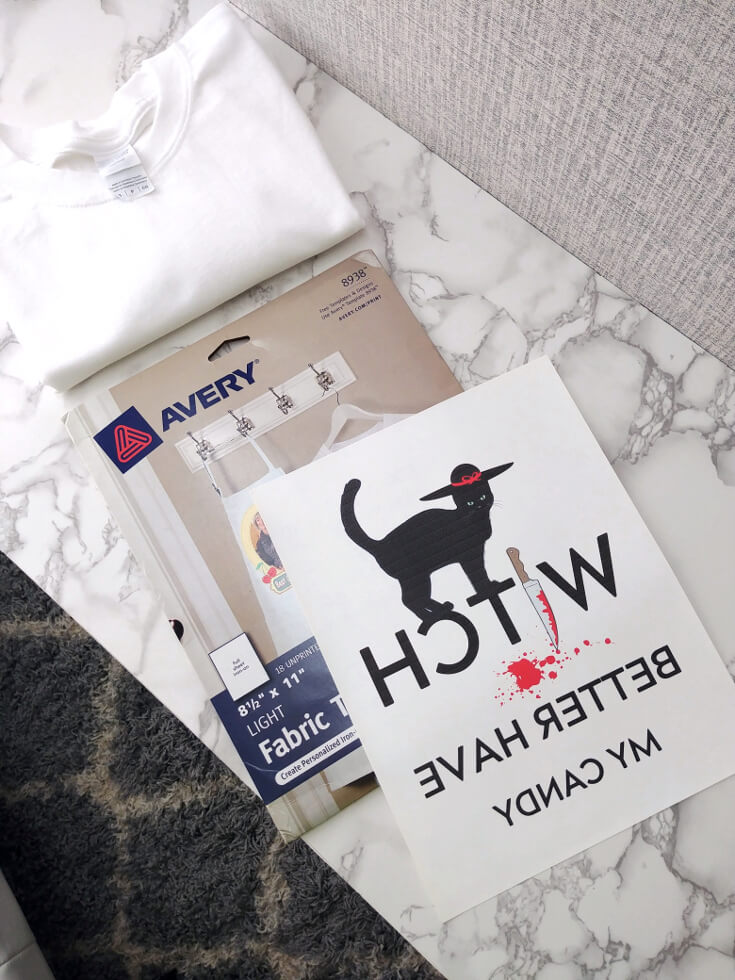
There are a couple of must-have items for this DIY project and the iron-on transfer paper is one must-have item. For, this project Avery Fabric Transfer Paper was used but based on my first trial results I can't comfortably recommend this brand.
Here are a few issues experienced with Avery Fabric Transfer Paper:
- Any unused or untrimmed area on the design turns yellow
- The design begins to crack and flake off the t-shirt after the second wash
However, there are other iron-on transfer paper brands you may consider using for your own graphic t-shirt DIY project.
Personally, I will definitely try other iron-on transfer paper brands because being able to create my own graphic t-shirt on the fly is amazing!. Furthermore, the possibilities are endless! Thus, I refused to let my experience using Avery Fabric Transfer Paper deter me from creating more graphic t-shirts at home.
Printer:
A printer is a must-have for this DIY graphic t-shirt. For, this project I used the Canon all-in-one color inkjet printer. This printer is one of the cheapest printers available – it prints, copies, and scans. So overall not a bad deal.
However, it didn't do the best job of printing the t-shirt design on the iron-on transfer paper. In fact, I was a little disappointed with how dull the colors were especially the black color in the custom t-shirt design.
Nevertheless, with all things considered the iron-on transfer paper quality could have contributed to the dullness observed in the custom print design so I can't directly blame the printer until I experiment with other iron-on transfer paper brands.
Pencil:
A pencil is optional. However, using a pencil helps you create a cutting guide which in turn helps you comfortably cut around the design without accidentally cutting into the design.
Therefore, if you are worried about cutting part of your custom print design accidentally, definitely use a pencil to trace around the design before you begin to trim the excess transfer paper.
Scissors:
A pair of sharp scissors is needed to trim off the excess transfer paper.
Pillowcase:
You may be wondering why you need a pillowcase. After all, the project isn't about a custom pillowcase.
Well, the pillowcase is used as a protective barrier between the heat from the iron and the flat surface you select to iron transfer the design onto the t-shirt.
Plus, the pillowcase also provides some padding that helps the design transfer onto the t-shirt better.
Now, you can use other items like a folded flat sheet, a bath towel instead of the pillowcase. In fact, as long as the item protects the flat surface from the heat and provides some padding it should work just fine.
Iron:
Without an iron, transferring the design from the transfer paper onto the t-shirt will not be possible unless you have a heat press machine. Therefore, add your iron to the supply pile because it's needed!
Graphic T-Shirts At Home Using Iron-On Transfer Paper: Instructions
- Step 1: Create and print the design
- Step 2: Trace and Trim the design
- Step 3: Select a flat surface to iron transfer the design onto the t-shirt
- Step 4: Iron the t-shirt to prepare the surface for the transfer
- Step 5: Iron transfer the design onto the t-shirt
- Step 6: Let the t-shirt cool down for a few minutes
- Step 7: Peel the paper backing from the transfer
- Step 8: Wash the t-shirt
Step 1: Create and print the design
Using a graphic design solution to create your custom t-shirt design. I used Canva to create this Halloween custom t-shirt design "Witch Better Have My Candy" and it was so easy.
In fact, I completed this design in less than ten minutes. You can also use other solutions like Adobe Illustrator or even Microsoft Word.

After your custom t-shirt design is created it's time to print! For printing, ensure you select the mirror print option in the print window before printing your t-shirt design on transfer paper – this is a step you cannot skip.
If your printer isn't capable of mirror printing use the paint program on your computer to flip your custom t-shirt design horizontally.
Step 2: Trace and Trim the design
Trace the design using a pencil then carefully trim the excess iron-on transfer paper using a pair of sharp scissors.

If you are confident you won't accidentally cut into the design then you can skip tracing. Instead, just use a pair of scissors to trim the excess transfer paper.
Step 3: Select a flat surface to iron transfer the design onto the t-shirt
A flat surface is a must for transferring the design onto your t-shirt. Therefore, use a flat uncluttered surface to create your DIY graphic t-shirt.

Tables are perfect for such tasks. However, ensure the table surface is protected using the pillowcase or a folded flat sheet. Since you definitely want to avoid damaging the surface of the table while transferring the design onto the t-shirt.
Related Posts:
- Cheapest DIY Throw Pillow Insert No-Sew
- Download Free Printables from the Resource Library
- Inexpensive Dollar Tree DIY Framed Affirmations
- How To DIY Gold and White Filing Cabinet Makeover
- 15 Romantic Valentine's Day Cards DIY Romantic Cute Card Ideas
- Adorable Halloween Costumes For Dogs
- How To Make Halloween Marshmallow Ghosts Or Perhaps Marshmalloweens?
Step 4: Iron the t-shirt to prepare the surface for the transfer
Ironing the t-shirt before attempting to transfer the design onto the shirt creates a warm wrinkle-free surface the helps the design transfer onto the shirt quicker. It also removes any moisture that may be present which may prevent the design from transfer onto the t-shirt.
Step 5: Iron transfer the design onto the t-shirt
Now here's the fun part you've been waiting for! Yes, it's that time to finally iron transfer the design onto the t-shirt. Now how long you need to iron transfer the design onto the t-shirt will depend on the transfer paper brand used.
However, based on my experience applying enough heat and pressure should help the design adhere to the surface of the t-shirt easily.
In regards to time, setting the iron at the highest temperature with no stream for about four to five minutes should do the trick.
Nevertheless, to be on the safe side follow the instructions given by the brand to ensure you increase your chances of creating the best DIY custom t-shirt print as possible.
Step 6: Let the t-shirt cool down for a few minutes
After ironing on the design to the t-shirt you just want to peel the paper backing from the transfer to reveal your masterpiece I know!
However, you must resist the urge! Instead, allow the t-shirt to cool down for a few minutes because you don't want to burn your fingers.
Furthermore, the design is still in the final stages of completely adhering to the t-shirt and you don't want to disturb that process.
Step 7: Peel the paper backing from the transfer
Now for the moment of truth! It's time to peel the paper backing from the transfer. This step should be extremely easy however, that isn't always the case.
If you are having difficulty peeling the paper backing from the transfer repeat step 5 for a few minutes then try again. Usually, a little extra heat is all that's needed to loosen up the design from the transfer paper.
Step 8: Wash the t-shirt
Finally, consider washing your DIY graphic t-shirt before wearing it just in case the design bleeds.

Want this Halloween Custom T-Shirt Design?
Download it and more from the Resource Library! Don't have access, well gain access to the resource library here!
How To Make A Graphic Tee
Source: https://www.chiclypoised.com/how-to-create-graphic-t-shirts-at-home-using-iron-on-transfer-paper/
Posted by: bushthisiumok.blogspot.com
0 Response to "How To Make A Graphic Tee"
Post a Comment